
Teams
The Teams view summarizes active teams for the account.
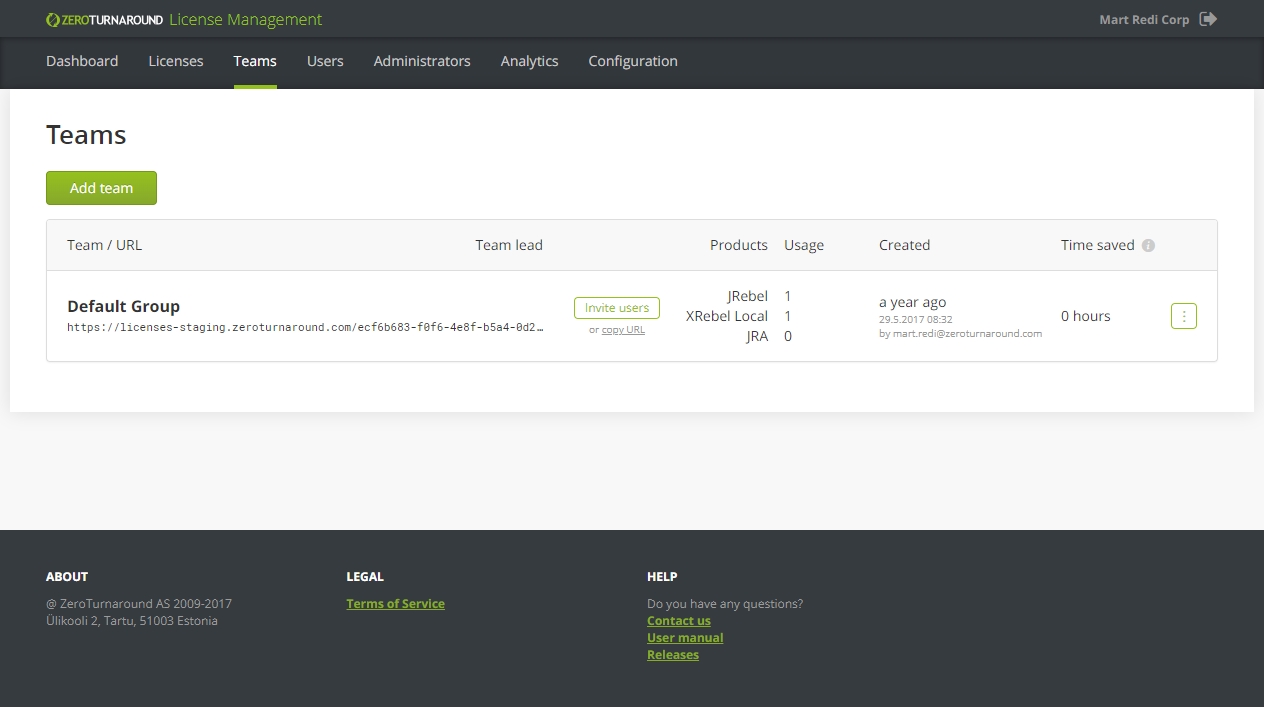
The following information is displayed for each team:
Team name / URL: The team name and unique URL that is used to activate products for members of the team.
Team lead: (Optional) The email address of the person managing the team. If not specified, the team is managed by the account administrator.
Products: Which products are available for activation using the team.
Usage: How many seats for each prouct are activated for the team.
Created: The administrator who created the team and the team creation date.
⋮: The team’s context menu:
Click Edit team to edit the team.
Click View users to see all users in the team.
Team leads
A team lead is an administrator who can only manage teams assigned to them.
Team leads can: invite and block users, see analytics, change the team’s name, and default redeploy time for assigned teams.
Team leads cannot: edit configuration, manage administrators, change seat limits of a team, or create or delete teams.
Default redeploy time
You can set a default redeploy time to a particular value for users of the team. If the user has set a custom value from their JRebel client, it will not be overridden by this value.
If you change a team’s default redeploy time, the system will immediately recalculate past statistics and calculate future data using the new value.
Add a team
Click Add team.
Enter the team name.
(Optional) Enter the Team lead email. If you do not wish to add a dedicated team lead, select I want to manage the team myself.
Edit the product information for the team:
Enable JRebel to allow the team access to the JRebel seat pool. Enable XRebel to allow the team access to the XRebel seat pool.
Enter a Seat limit to set a maximum number of JRebel or XRebel seats for the team. This option is enabled by default.
Enter the Default redeploy time for the team.
Note
Setting a seat limit determines the maximum seats available for the team. It does not preallocate the specified number of seats to the team.
Click Add team.
Invite users to a team
Next to a team’s name, click Invite users to invite users to the team.
Enter the user emails, then press Add. Review the emails, then press Send invite.
Tip
To review pending invites, next to the team’s name, click ⋮ > View users.
Users will receive an email with the team URL, and product installation and activation instructions.
Edit a team
Next to the team’s name, click ⋮ > Edit team.
Edit the team’s settings.
Click Save changes.
Delete a team
Next to the team’s name, click ⋮ > Edit team.
In the lower left corner of the editing dialog, click Delete team.
Click Delete.
Warning
Deleting a team will immediately revoke product access for any users who have activated products with the corresponding Team URL.