Organization settings
Settings > Organization settings allows you to configure various organization settings:
Add a domain
Configure single sign-on (SSO)
Enable two-step verification
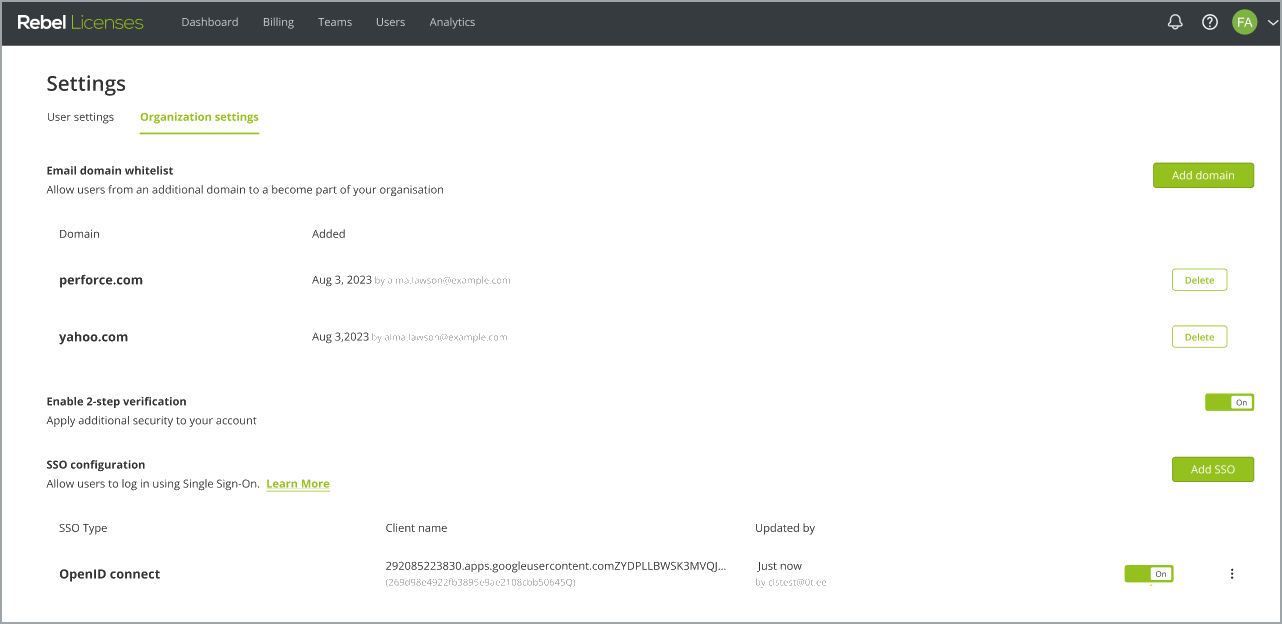
Email domain whitelist
The Email domain whitelist allows restricting product activations to a specific set of domains used in email addresses.

Note
Adding any email domain whitelist entry immediately blocks activation attempts from any users with non-whitelisted email addresses. When email domain verification is enabled, all activation attempts also need to be verified by end users using an email-based activation verification link.
Add an entry to the email domain whitelist
To add a new email domain whitelist rule:
Click Add domain.
Enter the email domain.
Click Add.
Usewildcards in domain whitelist entries
You can use the asterisk symbol (*) inside the domain name entry. This will match any number of characters between the literals.
Examples: jrebel.*, *.jrebel.com, jrebel-*.com
Note
Adding an asterisk to the end of the domain (e.g. jrebel.*) will only match top-level domains (for example, jrebel.com, but not jrebel.maliciousdomain.com).
Remove an entry from the email domain whitelist
Next to entry that you want to remove, click ⋮ > Delete.
Configure SSO
You can configure SSO to authenticate users using the OpenID Connect (OIDC) authentication method. Use OIDC to configure SSO between a Cloud License Server and a third-party identity provider. For more information, see OpenID Connect.
Note
To configure SSO, you must be assigned the Organization Admin or Organization Owner role.
You can add multiple SSO configurations but you can only enable one configuration.
Prerequisites for OIDC
Verify that the Identity Provider (IdP) supports the OIDC Discovery Endpoint and uses the standard Well-Known Configuration metadata values. For more information, see OpenID Provider Metadata.
Set the Client Authentication method to use HTTP POST to authenticate with the Authorization Server, as CLS only supports this method. If your identity provider defaults to basic HTTP authentication, consider using HTTP POST. For more information, see Client Authentication.
Verify that the Scopes include the openid and email scope values. The CLS will request the openid and email scopes from the identity provider by using the OIDC scope parameter. While the openid scope is mandatory and enabled by default, some identity providers may require the email scope to be explicitly added and enabled.
Configure OIDC SSO
You can use OIDC for SSO authentication with CLS. To set up SSO authentication using OIDC, create an OIDC client application with your identity provider.
Refer to the documentation of your OpenID provider to obtain the Client name, Client ID, Client secret, CallBack URL, and Discovery URL configuration values.
Add an SSO configuration
Go to the Settings > Organization settings section and click Add SSO.
In the dialog, enter SSO details as shown in the following table:
Field
Description
Client name
The unique name for the OIDC client application.
Client ID
The unique identifier of the application created upon registration with the identity provider.
Client Secret
The client secret of the application created upon registration with the identity provider.
Callback URL
The callback URL registered with the identity provider. The callback URL is where the identity provider sends the authentication response for the CLS application.
Discovery URL
The discovery URL of the identity provider you want to connect to is the well-known configuration URL with a structure /.well-known/openid-configuration.
Click Verify.
Verify SSO
After adding an SSO configuration, you must verify it. The verification can be done when SSO configuration is saved as a draft or when the verification is pending.
To verify SSO when the configuration is saved as a draft:
Go to the Organization settings > SSO configuration section.
Next to the SSO type, click ⋮ > Edit.
Check the relevant fields, then click Verify.
To verify SSO after the configuration is added (for example, if the verification is pending):
Go to the Organization settings > SSO configuration section.
Next to the SSO type, click ⋮ > Verify Now.
After being redirected to the identity provider’s page, complete the verification.
Enable or Disable SSO
Enable SSO
After you have verified SSO, you can enable it.
Go to Organization settings > SSO configuration section and turn on Enable 2-step verification to apply additional security to your account. After enabling two-step verification, every login attempt must be verified by clicking the login link sent to the user’s associated email address.
Disable SSO
Go to Organization settings > SSO configuration section and turn off Enable 2-step verification.
Click Confirm to disable SSO.
Sign in with SSO
To sign in with SSO, go to the Sign-in to your account page and click Single sign-on. You are redirected to the identity provider to complete the sign-in process.
Note
If you do not have SSO configured, you can log in to your account by using an email address and password.
Edit, Delete, and View SSO details
You can view and edit the configuration of your existing SSO, or delete an SSO configuration if you don’t need it.
Edit an SSO configuration
Go to the Organization settings > SSO configuration section.
Next to the SSO type, click ⋮ > Edit.
Edit the relevant fields, such as the Client name, Client ID, Callback URL, Discovery URL, and Client Secret.
Click Verify.
Delete an SSO configuration
Go to the Organization settings > SSO configuration section.
Next to the SSO type, click ⋮ > Delete.
Click Confirm.
After removing SSO configuration, the user will need to log in by using an email address and password.
View SSO details
Go to the Organization settings > SSO configuration section.
Next to the SSO type, click ⋮ > View details.