Managing licenses, teams (groups) and users
This chapter details how Rebel Licenses On-Premise can be used to manage licenses, teams (previously named groups) and individual users.
Note
As of version 3.3.8, groups have been renamed to teams.
Managed licenses
The managed license is the main enterprise license type since 2015.
Managed seats are permanently assigned to developers identified by their email addresses. The developer needs to specify his email address along with Team URL (previously Group URL) in the activation dialog.
To use a managed seat on another device, the developer needs to activate the new device using automated email authorization. The managed seats can be reassigned once the developer leaves the company. Reassigning managed seats is restricted and cannot be performed on a daily basis.
Warning
Managed licenses cannot be used with shared virtual machine setups that come with JRebel pre-installed.
Managing licenses
Importing licenses from Rebel Licenses
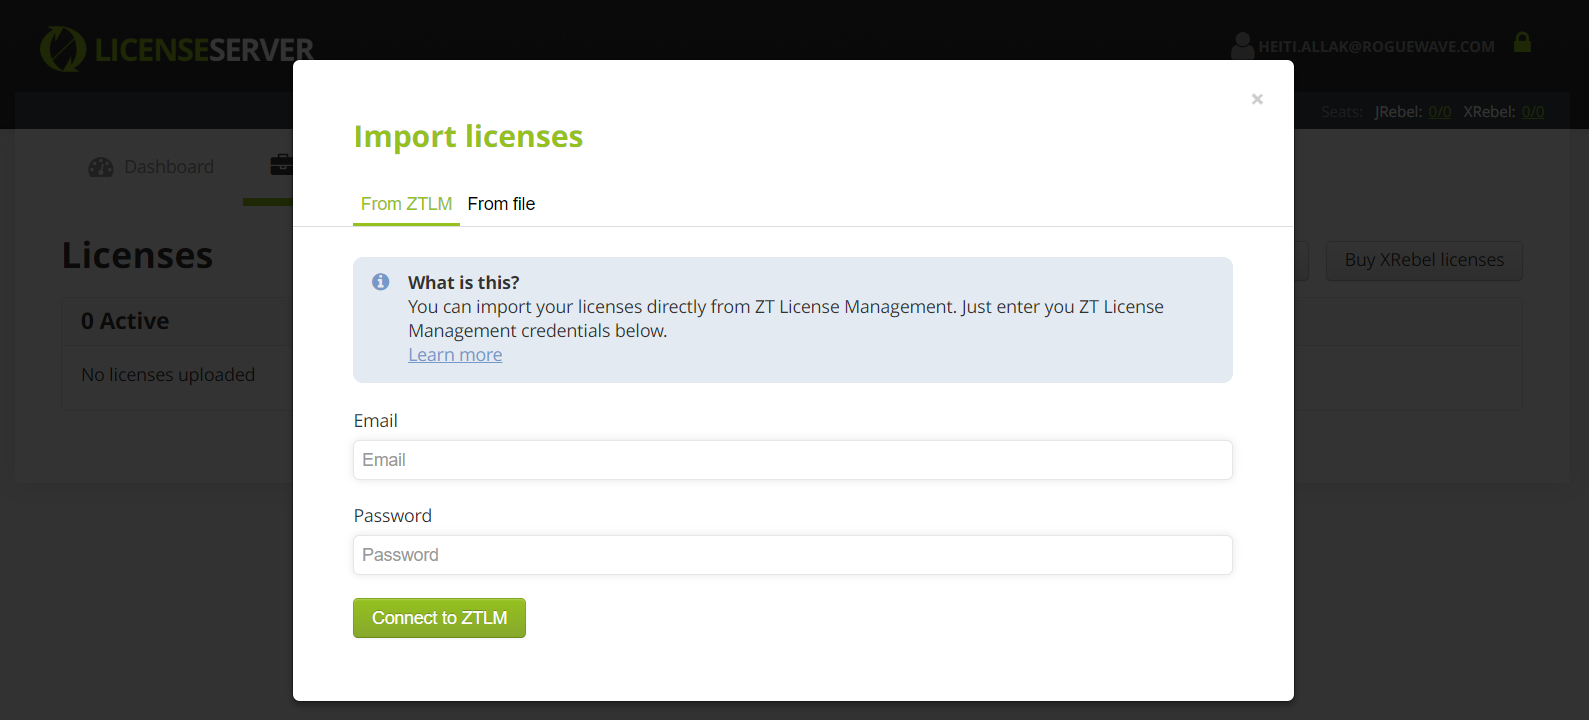
All JRebel and XRebel licenses are delivered to you through Rebel Licenses. When buying licenses, you will receive an email with your personal activation link. After you have finished activation, you can import your commercial licenses as they come available in Rebel Licenses.
Access the Licenses section of Rebel Licenses On-Premise.
Press the Import licenses button.
Enter your credentials for Rebel Licenses.
Press the Check for licenses button.
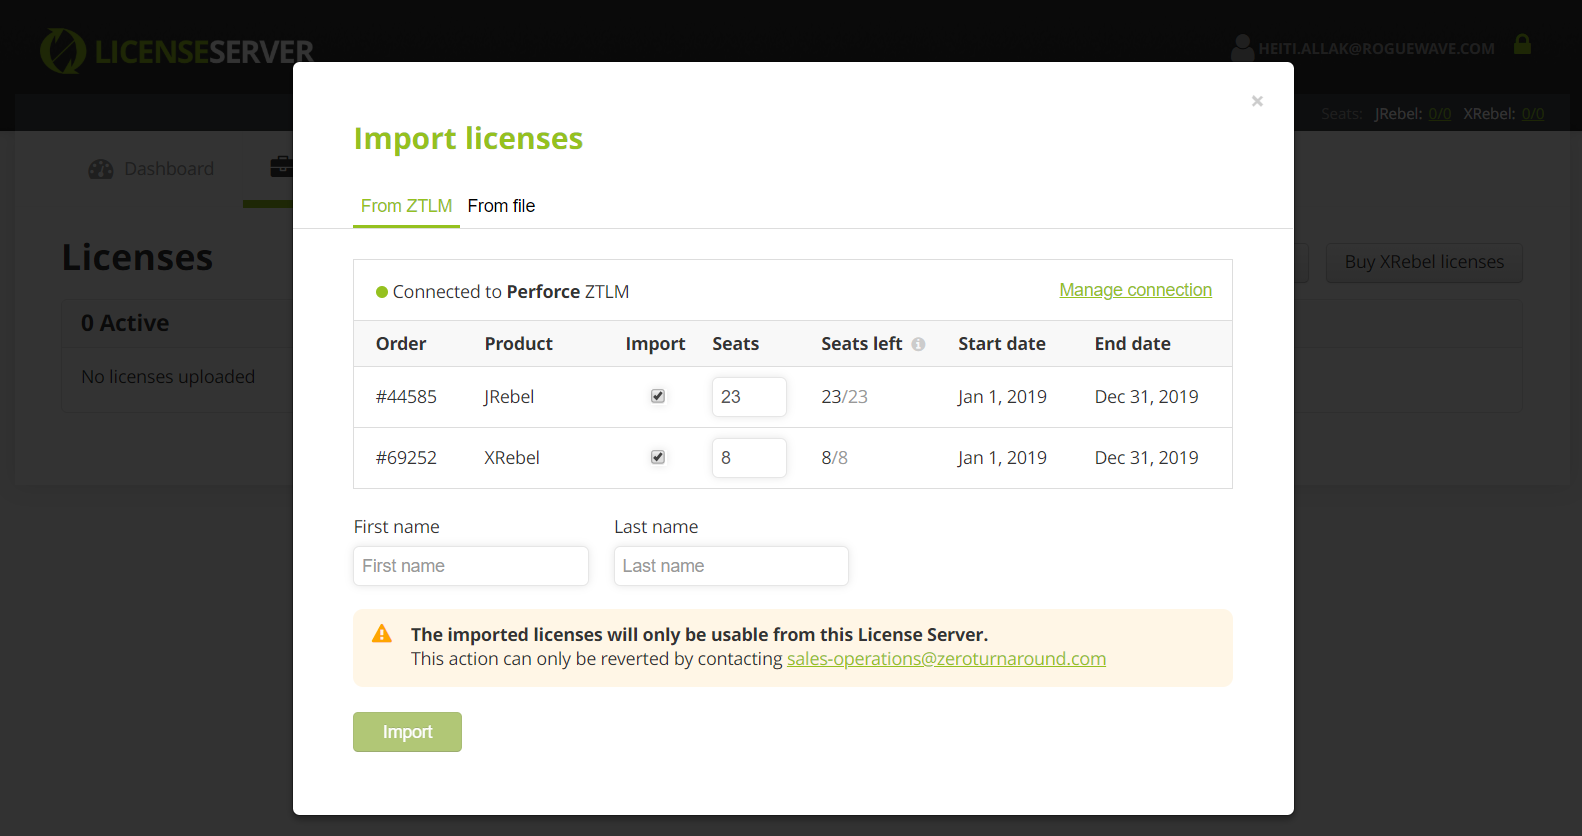
Mark the licenses which you wish to import to Rebel Licenses On-Premise.
Choose the amount of seats you wish to import from each license.
Enter your First and Last name.
Press the Import button.
Importing license files
If you are unable to import licenses from Rebel Licenses, you can import license files to the server. When purchasing licenses in bulk, you can export them from your Rebel Licenses account to be used on Rebel Licenses On-Premise. You will then receive an email with your license file. You will need to import this file to Rebel Licenses On-Premise in order to make seats available to users activating with Rebel Licenses On-Premise.
Access the Licenses section of the Rebel Licenses On-Premise.
Locate the section titled Import licenses.
Access the From file section.
Press Browse for license file button and browse to the license file. Once found, press Import to add the license to Rebel Licenses On-Premise.
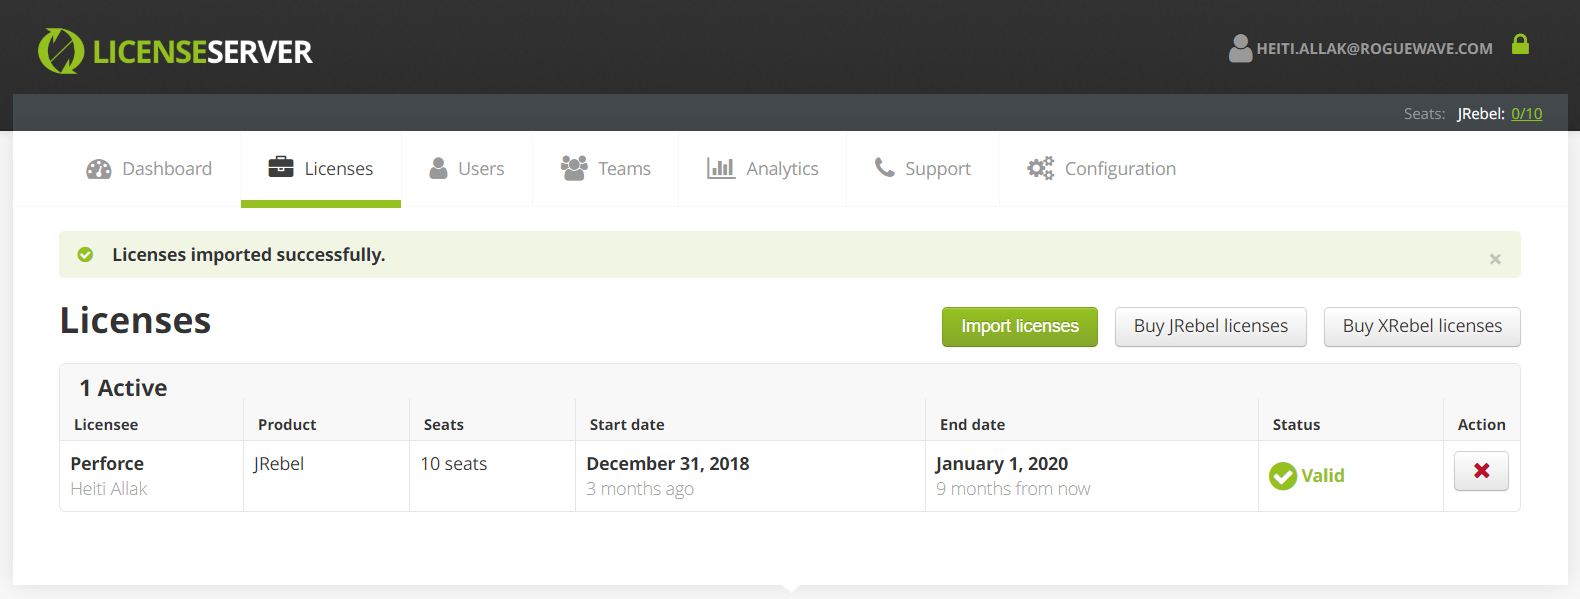
You will see a confirmation of successfull license file import with the license visible in the listing.

Deleting licenses
You can remove unused license files from Rebel Licenses On-Premise.
Access the Licenses section.
Locate the desired license in the licenses table.
Press the delete button located in the Action column of the table. You will be asked to confirm this procedure.
Managing users and teams
Managing teams
Rebel Licenses On-Premise team management provides flexible control for access and limits the scope of risk. Each team of users is given a unique team URL that developers use to activate their products. Teams can be created to match the organization structure. We recommend creating smaller teams. Having smaller teams makes it easier to regenerate and distribute a new team URL when the old one becomes compromised.
Adding teams
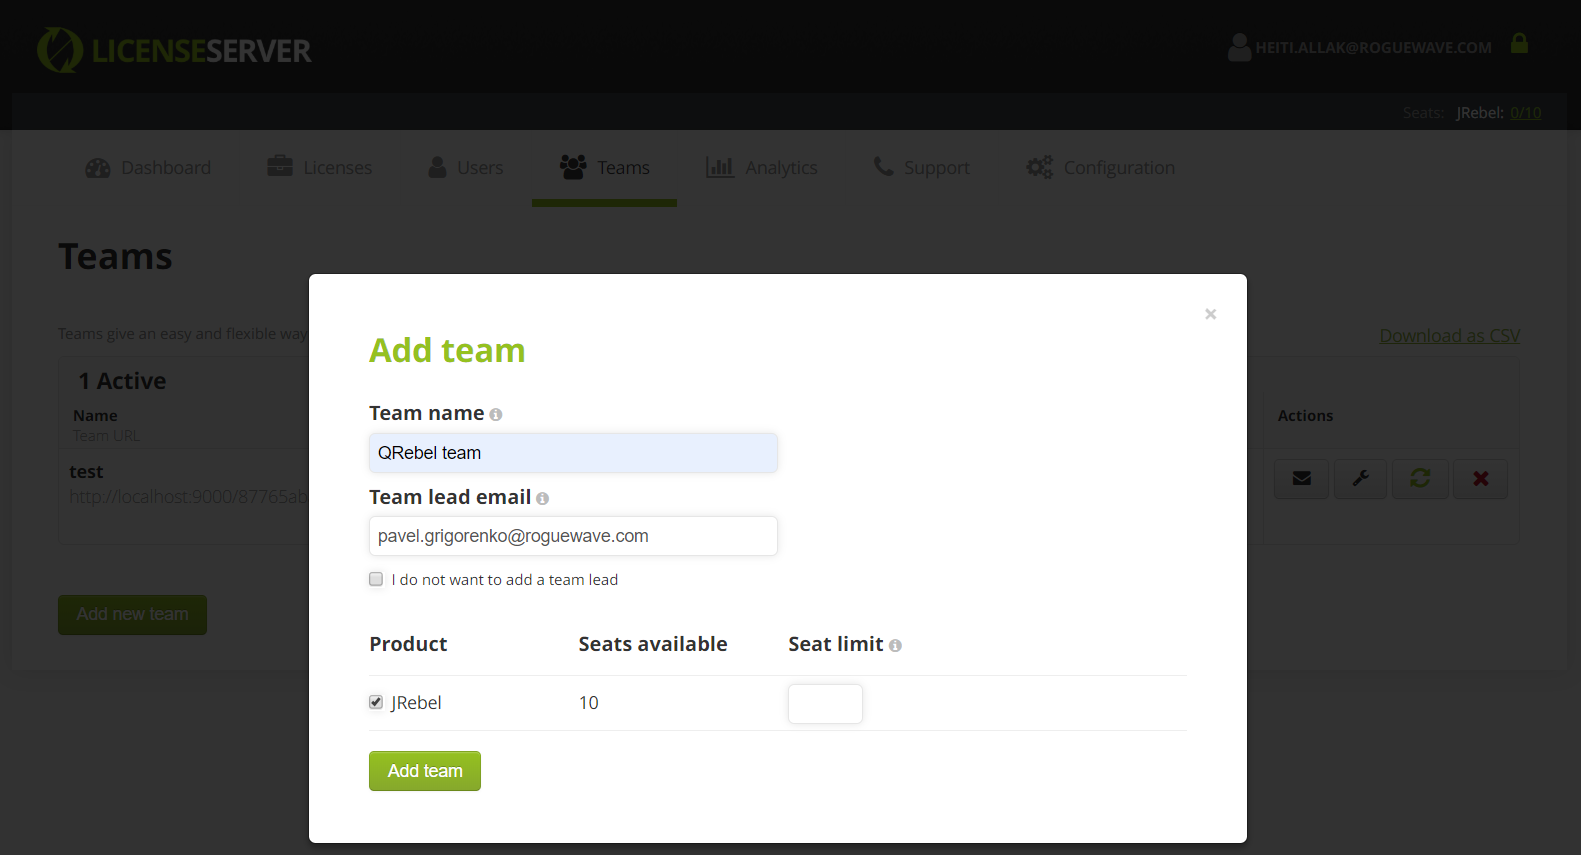
Follow these steps to add a new teams.
Access the Teams section.
Locate the section titled Add new team.
Specify the following items for the new team:
Team name - the name of the team.
Team lead email - choose who will manage this team. You can always do it yourself by choosing I do not want to add a team lead
Enabled products - choose which products are available for this team.
Seat limit - if you wish, choose how many seats are available for this team.
Press Add team to add the new team.
Renaming teams
You can quickly rename an existing team by hovering over its title in the Name column and pressing the pencil icon that appears. Specify the new name and press Save to confirm. Alternatively, press Cancel to discard the change.
Emailing team URL
 The teams section allows you to quickly email a team URL to multiple users. Simply press the Send to Users button in the Actions column and enter the desired email address. Press Send to generate the email.
Editing teams
 You can quickly edit the settings for any team by clicking the Configure IP filter button in the Actions column. From here, you can define whether the team should be restricted to a limited number of users and whether it should be restricted to a network subnet of your specification. Once a subnet restriction is introduced, the IP address is displayed in the Total Users column for the team.
Regenerating a team URL
 Regenerating a team URL can be required when the team URL is accidentally leaked. To do this, press the Regenerate Secret Token button in the Actions column. You will be asked to confirm this procedure.
Removing teams
 You can remove a team from Rebel Licenses On-Premise that is no longer required. To do this, press the Remove team button in the Actions column. You will be asked to confirm this procedure.
Managing users
You can view all identified users that connect to Rebel Licenses On-Premise for activation via the Users section. This table lists the user’s name (where applicable) as well as the user’s team (when defined) and license type. The table also includes the time when the user was last active and when using offline mode, its duration. The last column of the table allows blocking and unblocking license users.
You can also filter the table according to a user team of your choice. To do this, open the drop-down menu in the table header’s team column and select a team. The default choice is any, displaying all users.
Adding administrators
To add another Rebel Licenses On-Premise administrator, simply follow these steps:
Access Configuration.
Select Users.
Specify the new administrator’s email address and password.
Open Select Role and select Administrator.
Press Save.
Blocking and unblocking users
To block a user, locate the desired user’s name in the Users table and press the block button in the Actions column of the table. You will be asked to confirm this procedure.
Warning
Blocking a user will prevent the user from connecting to Rebel Licenses On-Premise. The managed license seat that the user was occupying before blocking will be made available to a new user. This procedure is restricted and can be used once per seat every 30 days.
Changing existing user email address
To change the email address of an existing Rebel Licenses On-Premise user, follow these steps:
Have the user reactivate his device using his new email address (with the existing team URL).
Verify that the new email address appears in the Users section.
Done!
When activating an existing device with a new email address, Rebel Licenses On-Premise automatically blocks the old email address.
Note
Rebel Licenses On-Premise user management is based on email addresses. After reactivation using the new email, the user with the old email should be blocked. Not doing this will cause the user to consume an extra seat. Rebel Licenses On-Premise automatically blocks the old user. However, if the user with the old email address is not automatically blocked, a manual block can be done via Users section.
Do not block the old email before the user has reactivated JRebel with the new email. Doing this will disable reactivation.


