IntelliJ IDEA
The JRebel plugin for IntelliJ IDEA includes the JRebel agent and helps you to automatically generate the JRebel configuration. It enables JRebel for applications and servers with a single click and improves the debugging support in the IDE.
Tip
Installing JRebel for the first time? See the JRebel Quick Start.
Note
JRebel for IntelliJ IDEA supports version 2023.1 and newer.
To view the full list of supported IntelliJ IDEA versions, see Supported JVMs, IDEs, application servers and frameworks.
Installation
Install from Plugin repository
You can install the JRebel plugin on a macOS, Linux, or Windows system. The JRebel plugin installation on Linux is identical to the JRebel plugin installation on a Windows system.
On Windows: Navigate to File > Settings > Plugins
On Mac OS: Navigate to IntelliJ IDEA > Preferences > Plugins
To install the JRebel Plugin via IntelliJ repositories, follow these steps:
Open the IntelliJ IDEA Settings… dialog. Select Plugins from the sections menu.
Use the Marketplace tab to browse and locate the JRebel plugin.
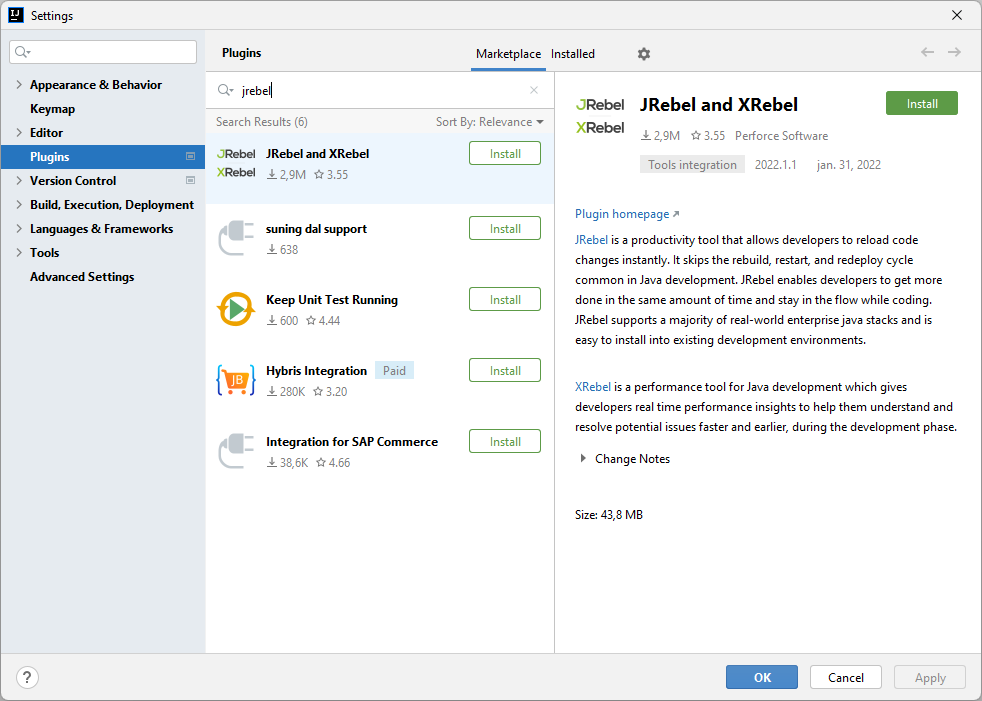
Click Install to download and install the JRebel plugin for IntelliJ IDEA.
Tip
IntelliJ IDEA might warn you that JRebel plugin depends on WebSphere and WebLogic plugins that might be disabled or not available in case of IntelliJ IDEA Community Edition. These dependencies are optional and you can either accept or decline enabling of the corresponding plugins.
IntelliJ might ask you to restart the IDE to complete the plugin installation.
Install from ZIP archive
The plugin can also be acquired as a ZIP archive. All the released versions of the plugin are hosted at https://plugins.jetbrains.com/plugin/?id=4441.
To install the plugin from the ZIP archive, follow these steps:
Download the latest version of the plugin from https://plugins.jetbrains.com/plugin/?id=4441.
Open the IntelliJ IDEA Settings… dialog. Select Plugins from the sections menu.
On the Plugins page, click
 and then click Install Plugin from Disk… to locate the plugin.
Browse to the location of the downloaded ZIP archive.
Click OK to confirm the installation. IntelliJ might ask you to restart the IDE to complete the plugin installation.
Upgrading to release version from nightly build
Note
Following this procedure is only required for IntelliJ IDEA 13 and 14 users.
Uninstalling the JRebel plugin:
Go to Settings (Preferences on macOS). Select Plugins.
Open the Installed tab and locate the JRebel plugin.
Right-click the plugin name and select Uninstall.
Reinstall the release version of JRebel for IntelliJ:
Go to Settings (Preferences on macOS). Select Plugins.
Use the Marketplace tab to browse and locate the JRebel plugin.
Click Install.
Activation
Following the installation, you probably do not have a license yet. Once your IDE restarts, the JRebel plugin notifies you about JRebel Activation.
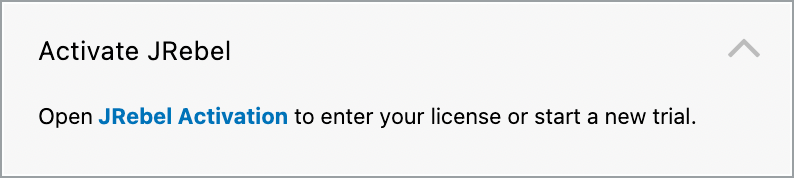
Click the JRebel Activation link to open the JRebel activation window. If you close the window, you can also open it from Help > JRebel > Activation.
The JRebel Activation window contains two tabs: Team evaluation or commercial license and Individual trial.
Team evaluation or commercial license
Open this tab if you already have a JRebel license. You can select one of three activation options:
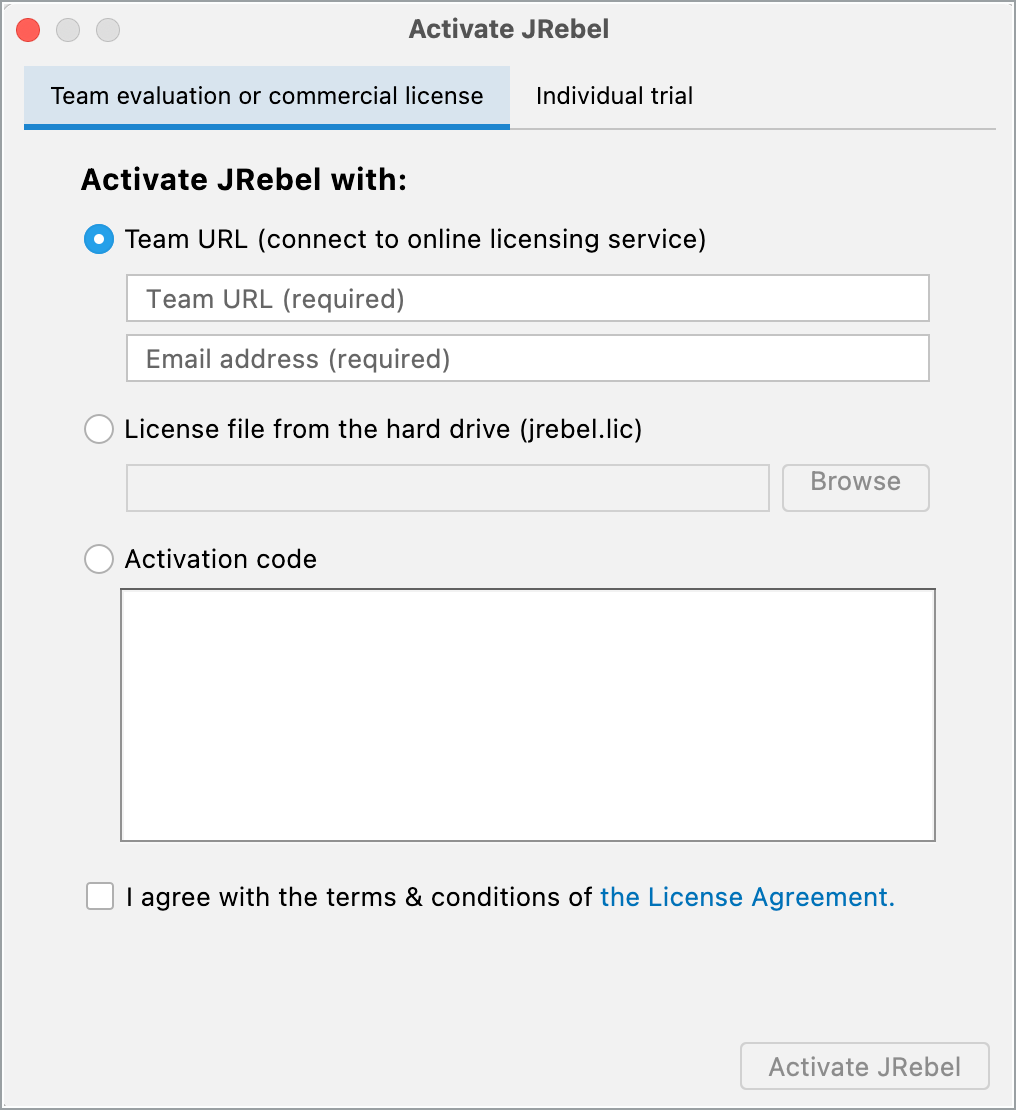
Team URL (connect to online licensing service) – Select this option if your network administrator provides you with a Team URL. The Team URL is a unique URL consisting of the License Server address and a unique key. Specify the Team URL into the first field and input your email address into the second. Click Activate JRebel. JRebel 6 requires License Server 3 or newer for activation.
License file from the hard drive (jrebel.lic) – Select this option if you bought a license. We will send you a
jrebel.liclicense file using email. Click Browse and locate thejrebel.licfile on the hard drive and then click Activate JRebel to activate using the license file.Activation code – Select this option and enter the trial activation code in the text field. Click Activate JRebel to activate using the activation code.
Click to select the checkbox I agree with the terms and conditions of the License Agreement to have a fully functional JRebel.
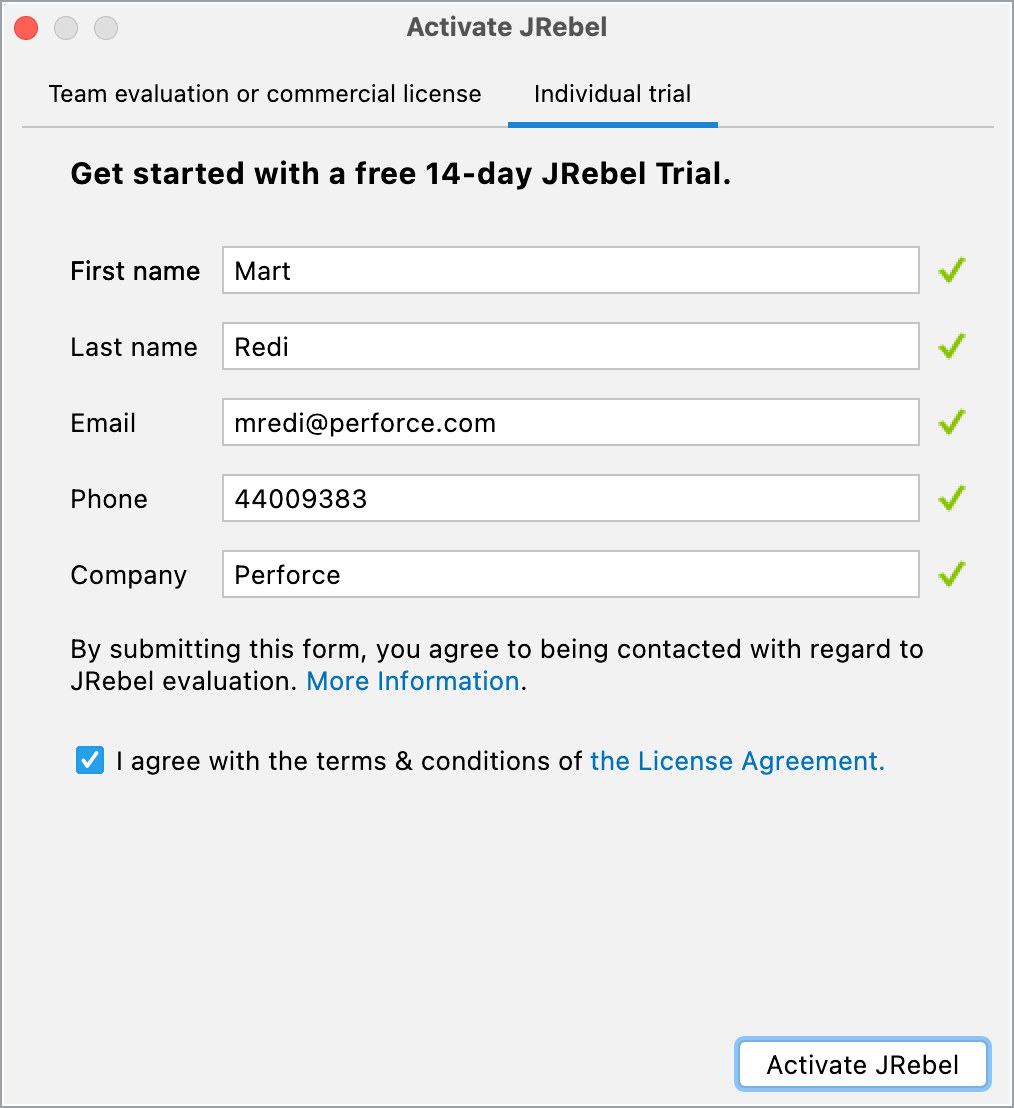
Individual trial
To start with a free 14-day JRebel Trial, enter your First name, Last name, Email, Phone, and Company information in the appropriate field. Click to select the checkbox I agree with the terms and conditions of the License Agreement and then click Activate JRebel.
Project configuration
The only required configuration file is rebel.xml, which is used by JRebel to map the running application to the workspace. The IDE plugin can automate the configuration for you.
Right-click on the project node in the Project view and select JRebel > Enable JRebel.
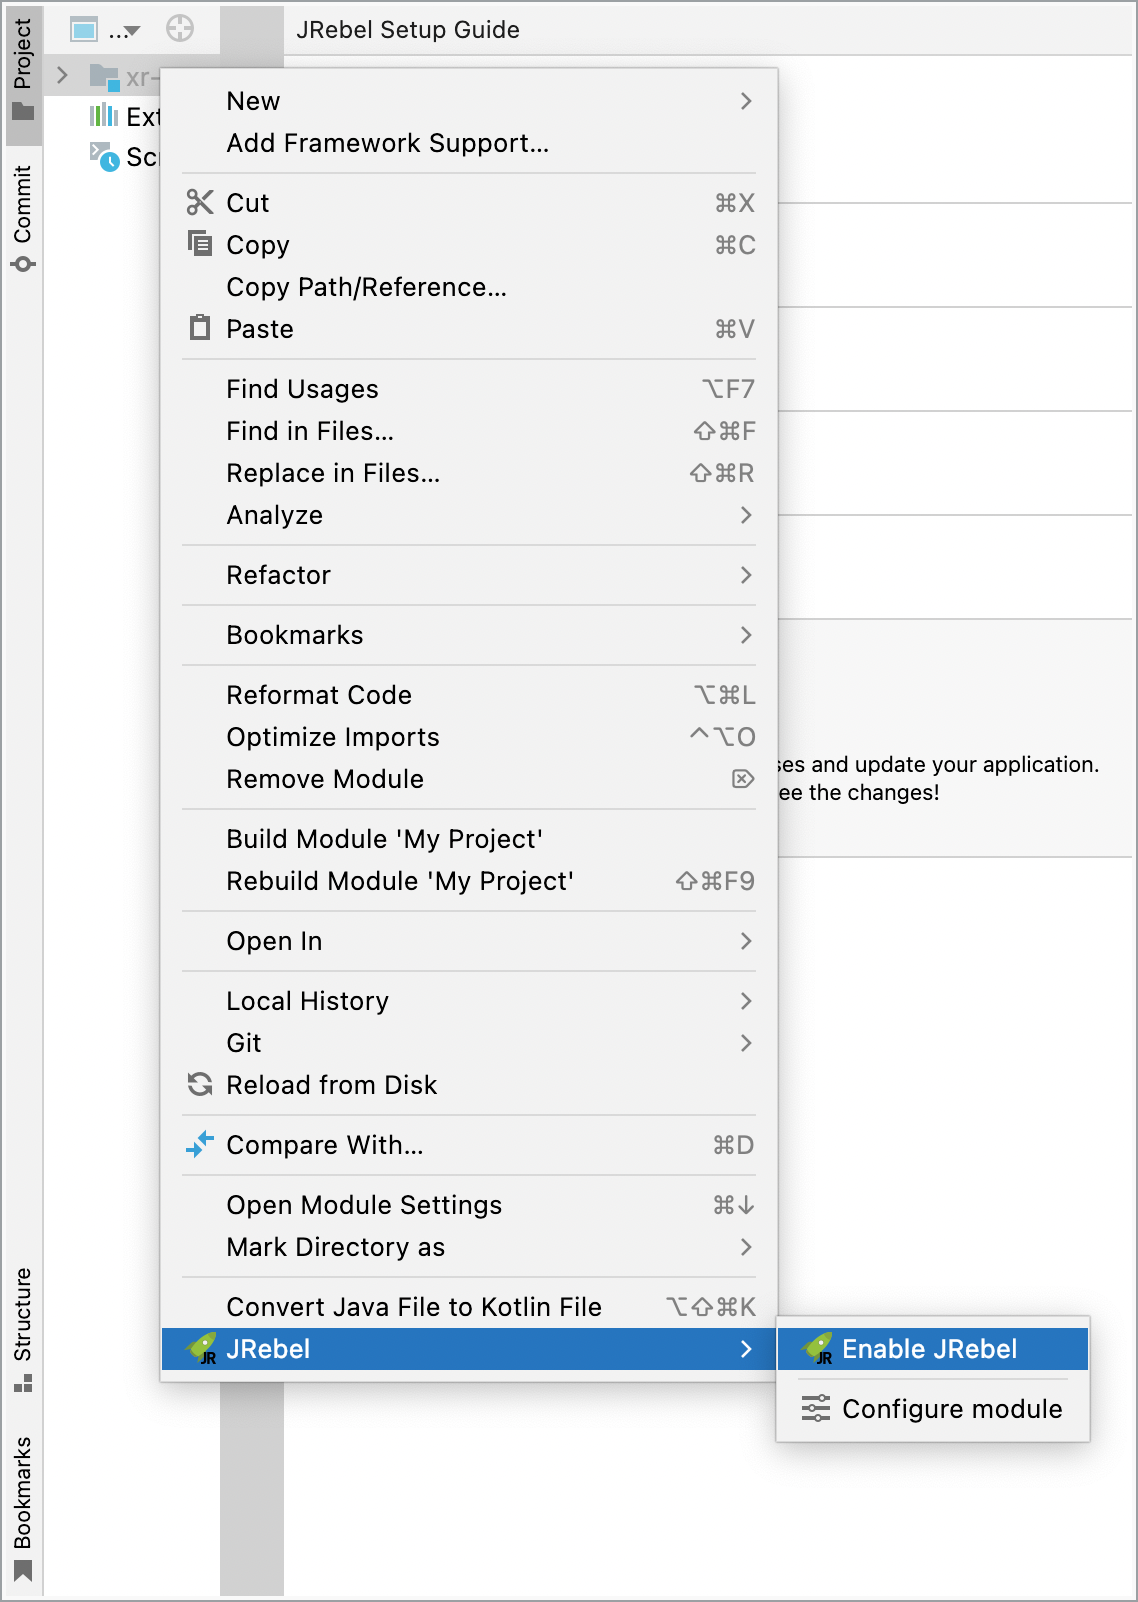
A dedicated configuration file is generated for every module in the project. For more information, see the Application configuration.
From this context menu you can also open the module configuration settings. Right-click the desired module and select JRebel > Configure module.
Note
IntelliJ IDEA does not compile classes on save by default. Press Ctrl+Shift+F9 to compile the current file, module, or package (you can also find this command via Build > Make Project).
Once you have generated
rebel.xml, you need to redeploy your application to the server for the configuration to take effect.
To make modifications to the configuration file, see the Reference for rebel.xml file format.
Note that when using either Maven or Gradle for your project, you might consider using the respective plugin for generating rebel.xml (and not the IDE plugin). For more information, refer to either Maven plugin or Gradle plugin.
Tool window
The JRebel tool window provides an overview of JRebel configurations for the active project. This tool window displays a flat list of modules of the project and allows to quickly enable JRebel configuration for a particular module.
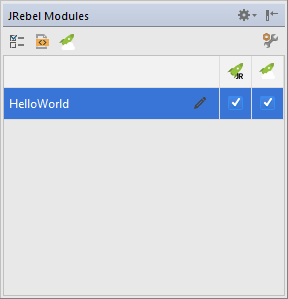
By selecting the ![]() checkbox next to the module name, you can generate the rebel.xml configuration file that is placed into the source tree of the project. For Maven projects, it is placed under
checkbox next to the module name, you can generate the rebel.xml configuration file that is placed into the source tree of the project. For Maven projects, it is placed under src/main/resources and will be picked up automatically during the build.
Note
The rebel.xml must be deployed to the application container with the application.
Using relative paths in rebel.xml
Refer General IDE configuration for instructions to commit rebel.xml and share the configuration with the whole team.
Server startup
The JRebel plugin for IntelliJ IDEA includes dedicated launch buttons. These buttons are located on the main toolbar and on the navigation toolbar by default. You can also find these commands via the Run menu.
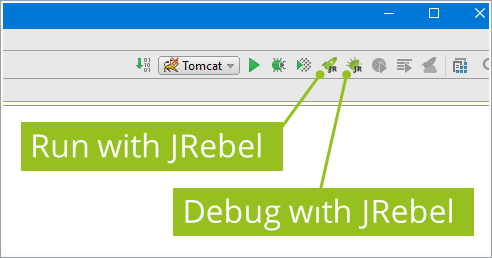
The first button launches the container with JRebel. The second button launches the container with JRebel in debug mode.
By launching the process from one of these buttons, the JRebel plugin automatically adds the appropriate command line parameters.
External servers and remote servers
When launching the application server from a command line or using a remote server or VM, open Help > JRebel > Configuration and select JRebel Startup.
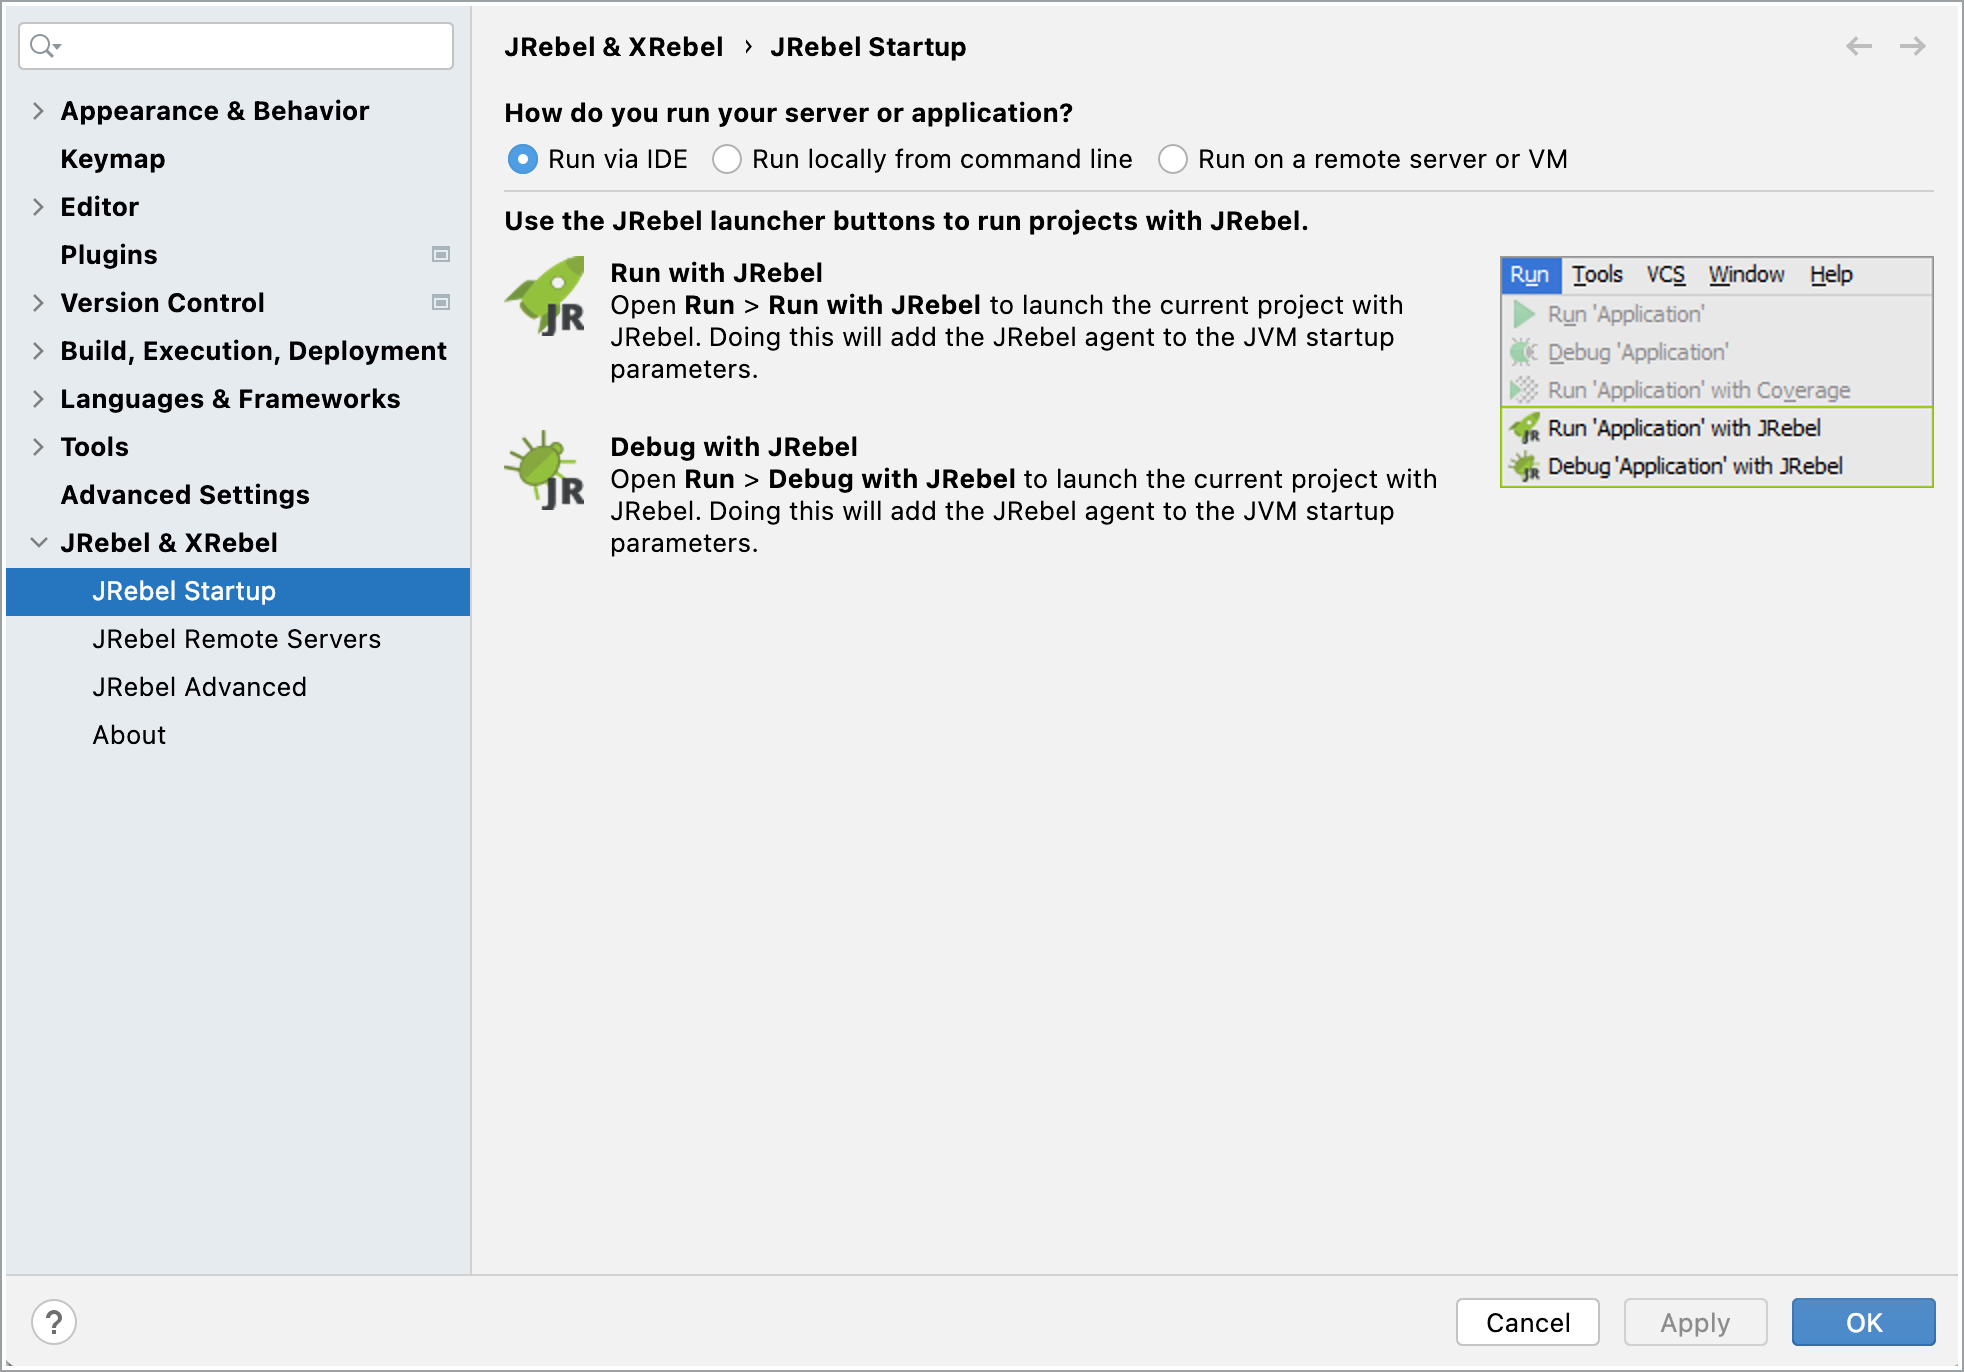
You can run the server or application using the following:
Run via IDE – Displays the server launch instructions from within the IDE.
Run locally from command line – Select this option to access JRebel’s integrated CLI instructions. Select your desired Java version and target environment to generate the JRebel startup script. Follow the instructions to start your external, command line server with JRebel enabled.
Run on a remote server or VM – Select this option to configure JRebel in a JRebel Cloud/Remote setting. Follow the instructions to run JRebel on a remote server or VM.
For more information about CLI instructions, see Running the container from command line.
Disable automatic application deployment
Open the Run/Debug Configurations for the corresponding application server via Run > Edit Configurations. On the Server tab, set On frame deactivation to Do nothing.
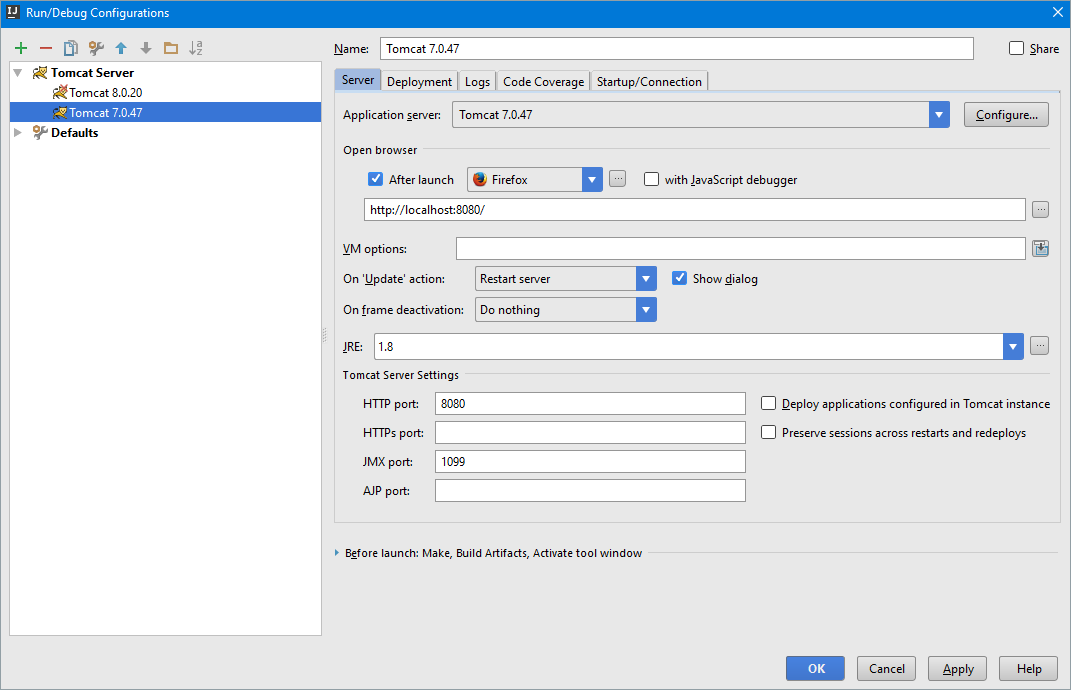
Now you can use the Run with JRebel or Debug with JRebel launch buttons to start the selected configuration with JRebel.
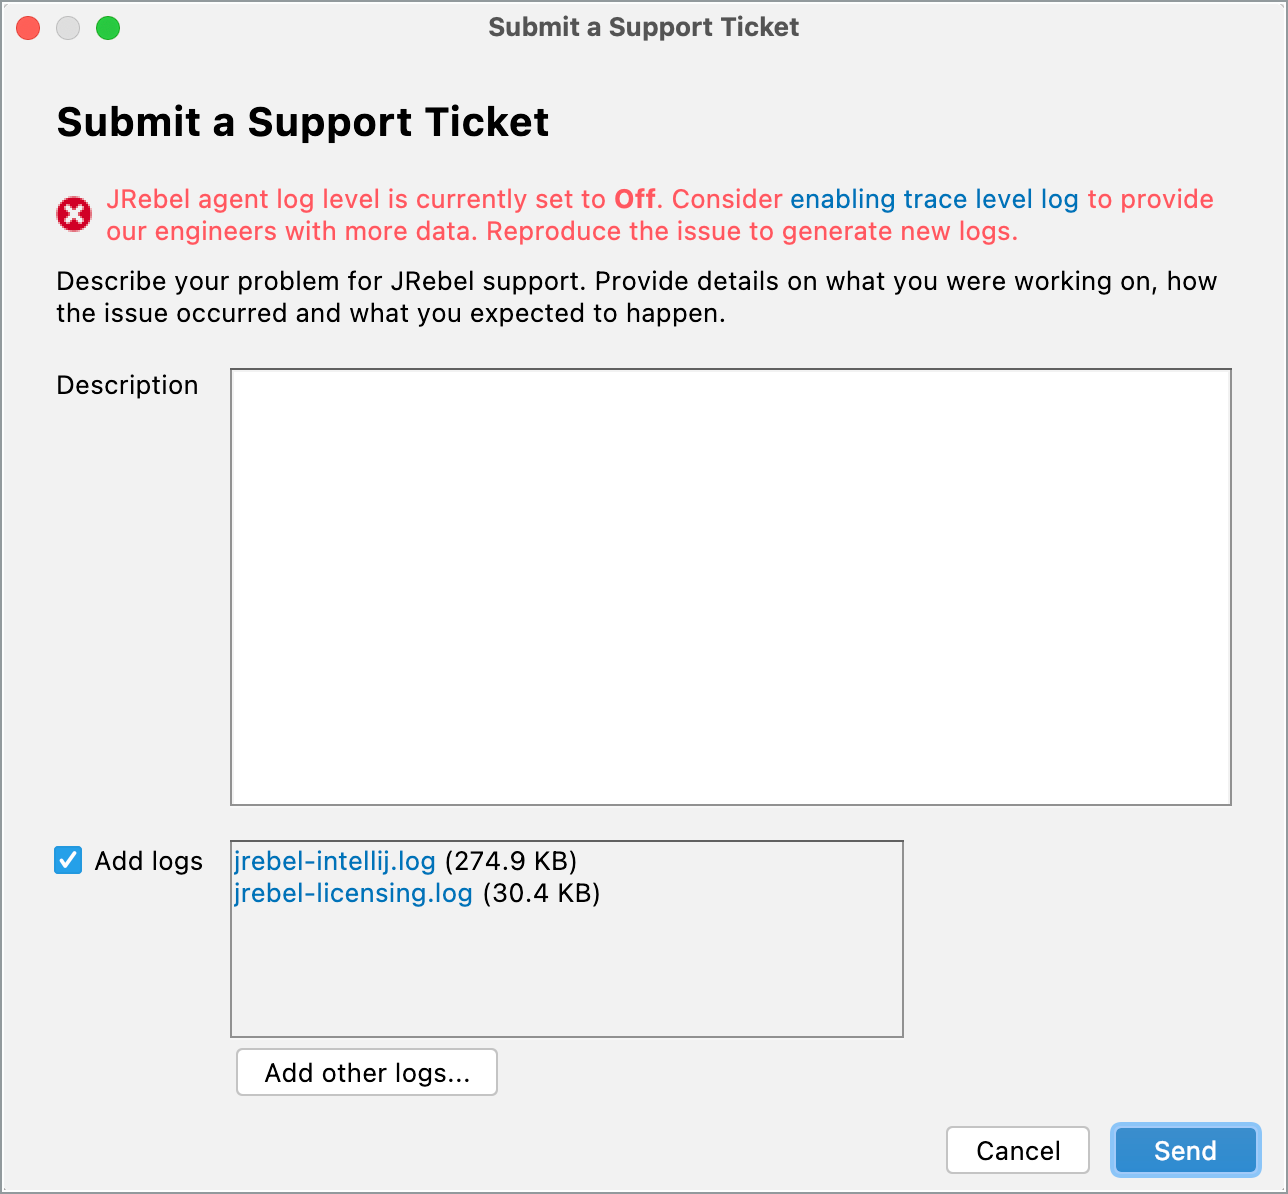
JRebel Support
You can quickly get in touch with JRebel Support using the embedded support dialog in Help > JRebel > Submit a Support Ticket.
Describe the issue for JRebel support. Consider enabling trace level log to provide JRebel Support more information on what went wrong and choose to add the log files to the support ticket. Click Send.
Updating the IntelliJ IDEA plugin
Open Help > Check for Updates on a Windows system. On macOS, open IntelliJ IDEA > Check for Updates.
Select JRebel from the list when available.
Click Update to continue.
Complete the installation.
Restart IntelliJ IDEA.
Note
To verify your current JRebel version, open Help > JRebel > Configuration and select the JRebel Advanced node to find your current plugin version. When upgrading from old plugin versions, a complete plugin uninstall and new version install is recommended.
IDE log level configuration
You can configure the JRebel IDE plugin log level using a command line parameter. Add the following parameter to the {user.home}/.jrebel/jrebel.properties file.
rebel.ide.log=[off|error|warn|info|debug|trace]
The default value for this property is info. The JRebel IDE plugin log file is stored in {user.home}/.jrebel/.